Building Steps
- Set up a Site
- Create a Template
- Create a CSS File
- Link to a CSS File
- HTML Basics
- Set Page Margins & Background
- Create Site Structure
- Create a Three Column Layout
- Style Headings and Paragraph Tags
- Style Website Links
- Create Breadcrumb Links
- Style Round Cornered DIVs #01
- Style Round Cornered DIVs #02
- Create Navigation Tabs
- Adding a Footer
- Create Editable Regions
- Name the Categories
- Create a Page from the Template
- Create a Library Item
- Creating More Pages
pageSUMMARY
How to create a template document in Dreamweaver - and the best way to view it to make workflow more efficient.
Creating a Template in Dreamweaver
Create a master template page for common elements
Now we have a Dreamweaver Site set up, it’s time to create a template page. The template file is essentially an HTML page which contains elements common to the entire website.
For the graphic designers amongst you, a template page is much like a ‘Master Page’ found in Quark XPress or InDesign. Any elements placed on the master page appear on every page linked to that master throughout the document. Any changes made to the master page are reflected on every page linked to it - obviously saving a lot of donkey work. So if a page number needs to be moved 1mm to the left in a 120 page brochure, it only has to be moved on the master page - and all 60 instances in the main document will move automatically.
A Dreamweaver Template works in a very similar way. Every page linked to it will be automatically updated whenever changes are made to the template. These common elements can’t be altered accidentally (or otherwise) on linked pages - just like master pages in InDesign.
Editable Regions
You have more control over a Dreamweaver Template page. In Dreamweaver you can define ‘Editable Regions’ within a template. The content of these regions can be edited on pages using the template as a master page - so your menus, headers etc remain unalterable, whilst the actual content of the page can be chopped and changed.
Create your Template
Creating your template page is very straightforward. Select:
FILE/NEW…
...and a New Document dialogue box will open.
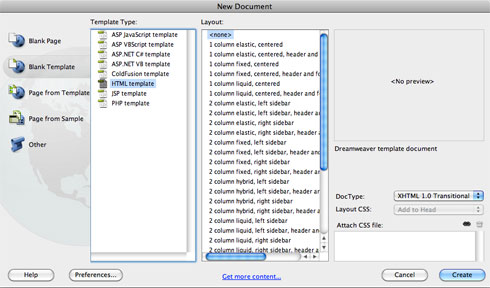
Create a new template
In the left column select Blank Template.
The contents of the middle column will change, offering new options based on your selection.
Choose HTML template from the middle and <none> from the right column.
Click Create.
A new blank page appears. Select:
FILE/SAVE AS…
...and a new folder called Templates will be automatically created within your local website directory. I’m going to name my page ‘using-dreamweaver-template.dwt’. Notice the suffix ‘.dwt’. This is automatically added and means (no prizes for guessing) (d)ream(w)eaver (t)emplate.
Efficient Workflow
Working in Split View
The most useful working view in Dreamweaver is the 'Split' View, accessed by clicking the 'Split' button in the top left of the working document window (figure 2).
This view enables you to simultaneously view the Code as well as the rendered Design View. If you select a word in the Design View you'll see it highlighted in the Code View - and vice versa. The fact that you don't have to constantly flick between modes (like in Adobe GoLive) saves a great deal of time.
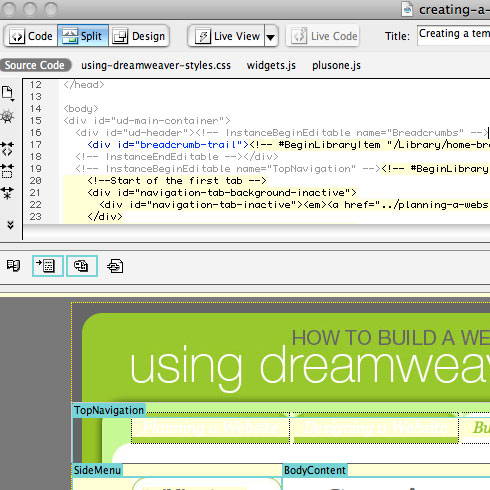
Figure 2 - working in Split View
In Dreamweaver CS4 the code window appears at the top of the working window. This was changed to a side view in the subsequent CS5 version - which works better.
Keep Head Content Visible
I also find it useful when working in Dreamweaver to keep the Head Content visible, especially when working with templates:
VIEW/HEAD CONTENT
As you'll see in figure 2 above, sandwiched between the Code and Design Views is a horizontal area containing a few little icons. The ones that are encased in a blue box will be editable in pages that are based on this template. Any icons outside the blue boxes will not be editable outside this template.
We'll get into what the icons represent in a later article... but for now, suffice to say that things like hidden keyword and description 'Meta' information that need to be changed on each page should remain editable (in the blue boxes). Anything that'll remain unchaged site-wide remain uneditable.
Creating a Template in Dreamweaver - End of Article
Go to previous article | Go to Home Page | Go to next article
Feedback required!
Please send any questions or feedback to: feedback@using-dreamweaver.com or leave it on our Facebook page.